
Step 1 – Validate SQL Server Database Mail
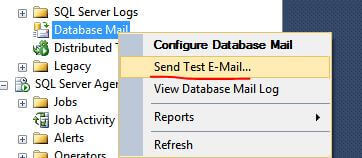
First test to see if the system is able to send email using the Database Mail profile in SQL Server Management Studio by navigating to Management > Database Mail, then right clicking on Database Mail and selecting the “Send Test E-Mail…” option.
Once the interface loads, select the correct Database Mail Profile, enter the To email address, Subject and Body. Once complete press the “Send Test E-Mail” button.
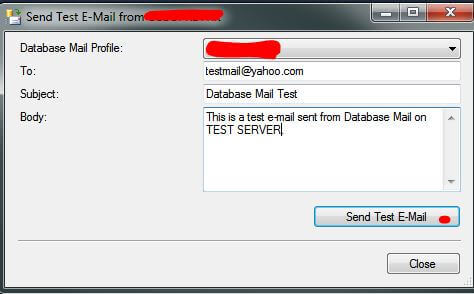
In our case, the SQL Server Database Mail test was successful hence it shows the ExternalMailQueue is enabled and there is no issue with the SMTP port being blocked by a firewall rule.
To check the external mail queue is enabled, you can use the following code:
SELECT * FROM msdb.sys.service_queues
WHERE name = N'ExternalMailQueue'

Step 2 – Validate SQL Server Operator
As the above test was successful, we next looked to see if someone had removed the Operator from SQL Server Agent in SQL Server Management Studio by navigating to SQL Server Agent > Operators. Our Operator was setup and the properties (not shown below) were correct.
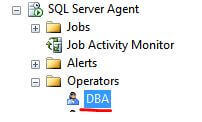
In our case, the operator still exists, the properties were correct, etc., so this was not the root cause of our issue.
Step 3 – Validate the SQL Server Agent Mail Profile
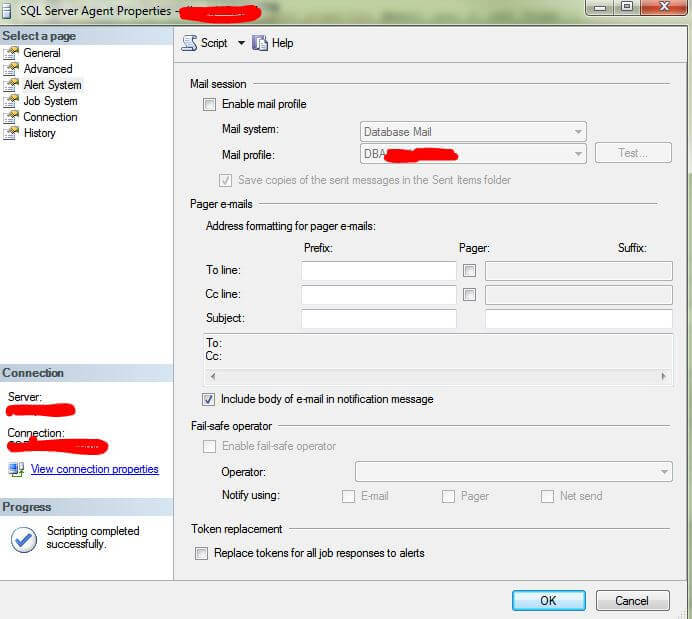
After the above two steps were not the issue, we concluded the issue was with SQL Server Agent. We thought about restarting SQL Server Agent, but since Jobs were completing successfully we started looking into the SQL Server Agent Properties. The Properties can be found in SQL Server Management Studio by navigating to SQL Server Agent then right clicking on SQL Server Agent to select the Properties option.

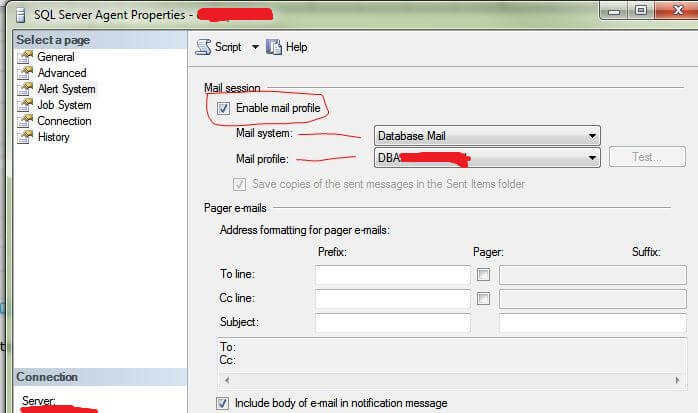
As notification is tied to the Alert system we looked at the “Alert System” tab. Looking at the properties we were able to figure out the issue. It was very clear that even though we have a Database Mail Profile setup it was not enabled for SQL Server Agent as shown below.
Step 4 – Enable Mail Profile in SQL Server Agent
To correct the situation, check the “Enable Mail Profile” check box and select the Mail System and Mail Profile in the interface as shown below or use the following command to enable the Database Mail Profile for SQL Server Agent.
USE [msdb]
GO
EXEC msdb.dbo.sp_set_sqlagent_properties
                 @email_save_in_sent_folder=1,
                 @databasemail_profile=N'DBAxxxxx', -- put your database mail profile here
                 @use_databasemail=1
GO
Comments